Configuring Snipe-IT for your Microsoft Azure Virtual Machine
What is Snipe-IT?
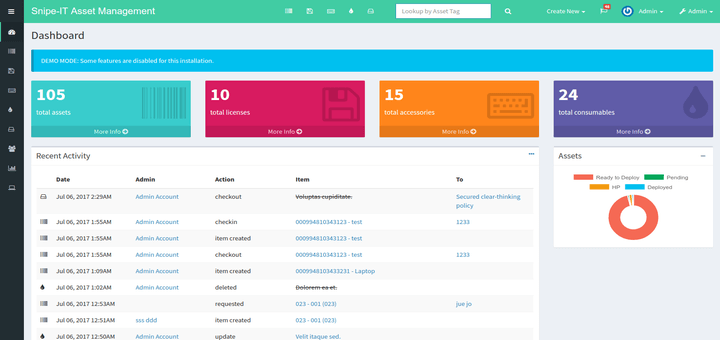
Snipe-IT is an open-source IT asset management system that helps you track:
- Hardware (laptops, servers, phones, monitors)
- Software licenses
- Accessories (keyboards, mice)
- Consumables (printer toner, cables)
- Check-out/check-in workflows
- Maintenance schedules
- Asset depreciation
Install Prerequisites
Install Docker and Docker Compose:
# Install Docker
curl -fsSL https://get.docker.com -o get-docker.sh
sudo sh get-docker.sh

# Add your user to docker group (avoid sudo)
sudo usermod -aG docker $USER

# Install Docker Compose
sudo apt install -y docker-compose

# Log out and back in for group changes to take effect
exit
SSH back in:
ssh -i homelab-vm_key.pem azureuser@100.x.x.x # Use Tailscale IP
Verify Docker installation:
docker --version
docker-compose --version
Deploy Snipe-IT with Docker Compose
Create directory structure:
mkdir -p ~/snipe-it
cd ~/snipe-it
Generate App Key:
# Run this on your VM
docker run --rm snipe/snipe-it php artisan key:generate --show
Create Docker Compose file:
nano docker-compose.yml
Paste this configuration:
version: '3.8'

services:
  # MySQL Database
  mysql:
    image: mysql:8
    container_name: snipeit_mysql
    restart: unless-stopped
    environment:
      MYSQL_ROOT_PASSWORD: SecureRootPassword1234 # Feel free to change this
      MYSQL_DATABASE: snipeit
      MYSQL_USER: snipeituser
      MYSQL_PASSWORD: SecureSnipePassword4567 # Feel free to change this
    volumes:
      - mysql_data:/var/lib/mysql
    networks:
      - snipeit_network

  # Snipe-IT Application
  snipeit:
    image: snipe/snipe-it:latest
    container_name: snipeit_app
    restart: unless-stopped
    depends_on:
      - mysql
    environment:
      # Database Configuration
      MYSQL_PORT_3306_TCP_ADDR: mysql
      MYSQL_PORT_3306_TCP_PORT: 3306
      MYSQL_DATABASE: snipeit
      MYSQL_USER: snipeituser
      MYSQL_PASSWORD: SecureSnipePassword4567 # Feel free to change this

      # Application Configuration
      APP_ENV: production
      APP_DEBUG: true
      APP_KEY:  # Will be generated on first run
      APP_URL: http://100.x.x.x:8080  # Replace with YOUR Tailscale IP
      APP_TIMEZONE: America/New_York  # Change to your timezone
      APP_LOCALE: en

    volumes:
      - snipeit_data:/var/lib/snipeit
    ports:
      - "8080:80"
    networks:
      - snipeit_network

volumes:
  mysql_data:
    driver: local
  snipeit_data:
    driver: local

networks:
  snipeit_network:
    driver: bridge
IMPORTANT: Edit these values:
- Replace
100.x.x.xwith your actual Tailscale IP - Change timezone if needed
- Update email settings if you want notifications (optional)
Save and exit: Press Ctrl+X, then Y, then Enter
Start Snipe-IT
Launch the containers:
cd ~/snipe-it
docker-compose up -d
Wait 2–3 minutes for initialization, then check status:
docker-compose ps
Expected output:
     Name                   Command               State           Ports
--------------------------------------------------------------------------------
snipeit_app     /entrypoint.sh                   Up      0.0.0.0:8080->80/tcp
snipeit_mysql   docker-entrypoint.sh mysqld      Up      3306/tcp, 33060/tcp
View logs to verify successful startup:
docker-compose logs -f snipeit
Press Ctrl+C to exit logs when you see:
INFO Server running on [http://0.0.0.0:80]
Complete Snipe-IT Setup
Access Snipe-IT in your browser:
- Open your web browser (on your laptop)
- Navigate to:
http://100.72.88.62:8080 - You should see the Snipe-IT setup wizard
Pre-Flight Setup:
- All checks should be green
✓ - Email check is optional
- Click
Next: Create Database Tables - Troubleshooting if Database Tables create 500 error:
docker-compose logs snipeit | tail -50 docker-compose logs mysql | tail -20 - If snipeit starts before mysql has time to connect, it's a race condition error.
- You can try to start each app separately to avoid collision:
docker-compose down docker-compose up -d mysql # Wait 30 seconds for MySQL to fully initialize sleep 30 docker-compose up -d snipeit - Otherwise, wait 30–60 seconds while tables are created
- You should see: "Success! Database tables created successfully"
- Click
Next: Create User - Create Admin User:
Site Name: Snipe-IT Asset Management Homelab First Name: Firstname Last Name: Lastname Email: placeholder@email.com Username: admin Password: Placeholder1234 Confirm Password: Placeholder1234 - Click
Next: Save User - Click
Login to Snipe-IT— http://100.x.x.x:8080/login
Initial Login:
- Username:
admin - Password: [The password you just created]
Configure Snipe-IT Basics
Navigate to Settings:
- Click
Settings(gear icon) in top right →App Settings
General Settings:
Site Name: [Your Organization] Asset Management
Default Currency: USD
Language: English, US
Timezone: [Your timezone]
Date Format: YYYY-MM-DD
Asset Settings:
Asset ID Prefix: LAB- (or whatever you prefer)
Asset Tag Generation: Random (or Sequential)
Default Purchase Cost: 0.00
Default Asset Model: [Leave blank for now]
Click Save at the bottom
Add Sample Assets (Testing)
Create a Category (click on the left side gear icon):
- Settings → Categories → Create New
Category Name: Laptops Category Type: Asset EULA: [Leave blank] - Click Save
Create a Manufacturer:
- Click
Create New Manufacturers
Create an Asset Model:
-
Settings→Asset Models→Create NewModel Name: Latitude 5420 Manufacturer: Dell Category: Laptops Model Number: L5420 Image: (Optional, I added one because visual aids help) - Click
Save
Create Your First Asset:
-
Assets→Create NewAsset Tag: LAB-001 Model: Dell Latitude 5420 Status: Ready to Deploy Serial Number: ABC123XYZ Purchase Date: mm/dd/yyyy Purchase Cost: 1200.00 Supplier: Dell Notes: Test laptop for homelab - Click
Save
Backup Configuration
Create a backup script:
cd snipe-it
nano backup.sh
Paste this:
#!/bin/bash
# Snipe-IT Backup Script

BACKUP_DIR="$HOME/backups/snipeit"
DATE=$(date +%Y%m%d_%H%M%S)

# Create backup directory
mkdir -p $BACKUP_DIR

# Backup database, use your own secure password
docker exec snipeit_mysql mysqldump -u snipeituser -p SecureSnipePassword4567 snipeit > \
  $BACKUP_DIR/snipeit_db_$DATE.sql

# Backup uploaded files
docker cp snipeit_app:/var/lib/snipeit $BACKUP_DIR/snipeit_files_$DATE

# Compress backups
tar -czf $BACKUP_DIR/snipeit_backup_$DATE.tar.gz \
  $BACKUP_DIR/snipeit_db_$DATE.sql \
  $BACKUP_DIR/snipeit_files_$DATE

# Cleanup uncompressed files
rm -rf $BACKUP_DIR/snipeit_db_$DATE.sql $BACKUP_DIR/snipeit_files_$DATE

# Keep only last 7 backups
cd $BACKUP_DIR && ls -t snipeit_backup_*.tar.gz | tail -n +8 | xargs -r rm

echo "Backup completed: $BACKUP_DIR/snipeit_backup_$DATE.tar.gz"
Make it executable:
chmod +x backup.sh
Test the backup:
./backup.sh
Schedule daily backups (optional):
# Open crontab
crontab -e

# Add this line (runs daily at 2 AM)
0 2 * * * /home/azureuser/snipe-it/backup.sh >> /home/azureuser/snipe-it/backup.log 2>&1
Create log file:
touch backup.log
What's Next?
In the next guide we will setup Wazuh for SIEM (Security Information and Event Management) logging.